140‐Day QuickBooks Trial Software
Installation Guide
This guide will help you install the 140‐day trial version of QuickBooks that is associated with your textbook. Depending on your textbook, the software may be available via digital download or DVD. This guide includes instructions for installing the software using both methods. Also included are instructions for toggling to the Pro edition of the software, which is necessary for some users. Be sure to check out the Common Questions section at the end of this guide.
|
|
Contents |
|
|
|
| Note! Your QuickBooks trial software is intended for use on a Windows‐based PC. The | |
software cannot be installed mobile devices using the iOS or Android operating system. |
|
Please see this page for more information on system requirements to install QuickBooks. |
Installing QuickBooks – Digital Download
If your trial version of QuickBooks is provided via digital download, you will access the software from the Intuit website.
Before you get started, make sure you have your license number and product number handy.
15‐digit license number: ___ ___ ___ ___ – ___ ___ ___ ___ – ___ ___ ___ ___ – ___ ___ ___
6‐digit product number: (QuickBooks 2014) 602 – 834 (QuickBooks 2015) 503 – 154
1.Close all running programs, including antivirus programs.
Remember to restart your antivirus program(s) after the software installation is complete. Download File B9294FC112C3076B8CC627D521960C490...
2.Open a web browser and navigate to http://quickbooks.com/download.
These instructions use Internet Explorer. Different web browsers may behave differently.
3.Click the QuickBooks Accountant link for your version of QuickBooks.
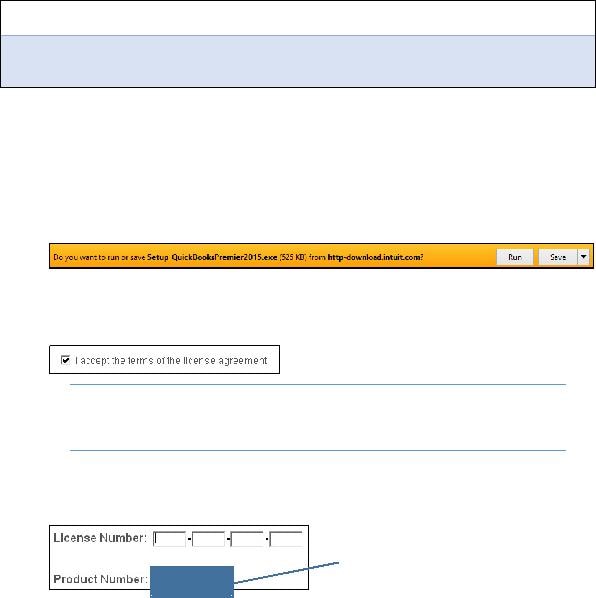
4.Choose the Run option in the download bar, and then choose Yes in the dialog box that appears.
Continue with the next step after the download completes.
5.Click Next in the wizard screen, and then click Next in the Intuit QuickBooks Installer window. : Use the command Get-FileHash [FILENAME] -Algorithm MD5
6.Click the checkbox to accept the terms of the license agreement; click Next.
Tip! If desired, use the Print link at the top‐right corner
of the window to print the License Agreement for your records.
7.Ensure that the Express (recommended) installation type is selected; click Next.
The Express installation will place QuickBooks in the default location on your computer.
8.Type your license number and product number in the provided boxes; click Next. Download File B9294FC112C3076B8CC627D521960C490...
For QuickBooks 2014, use 602‐834.
For QuickBooks 2015, use 503‐153.
9.Click Install.
The installation can take time, so be patient!
10.Click Open QuickBooks in the screen that appears after the installation is complete.
11.If a notice regarding how QuickBooks uses your Internet connection appears, click OK.
The QuickBooks trial software is now installed on your computer.
12.Toggle to the Pro edition of the software, if necessary for your course.
Download File B9294fc112c3076b8cc627d521960c490... -
: Use the command Get-FileHash [FILENAME] -Algorithm MD5 .
: Professional security tools like Kaspersky allow you to search for hashes in global threat intelligence feeds. 2. Verify File Integrity
If you have already downloaded a file and want to see if it matches this hash:
: Use a browser-based calculator like Hash File Online or WASM File Hash to calculate the hash without uploading the data to a server. 3. Determine Unknown File Types
If the file you downloaded has no extension or an unrecognizable name: Get-FileHash (Microsoft.PowerShell.Utility)
: Open Command Prompt and run certutil -hashfile [FILENAME] MD5 to generate the hash of your local file.